Neutron diffraction strain scanning measurements at ANSTO have validated a new theoretical model that successfully predicts the residual stresses and critical deposition heights for laser additive manufacturing.
The model, which was developed by Prof Ramesh Singh’s group from Indian Institute of Technology Bombay in association with Prof Wenyi Yan from Monash University, accounts for both thermomechanical behaviour and metallurgical transformation that takes place by direct energy deposition techniques, such as laser cladding.
“To collaborate with ANSTO and use the world-class facilities there can definitely enhance our research quality. This work, just published in Scientific Reports, is just one good example,” said Yan.
‘’This research was completed through a joint PhD training program between Indian Institute of Technology Bombay and Monash University. The first author Santanu Paul has finished his PhD study and is now working in an international company to develop software for additive manufacturing, ‘’said Yan.
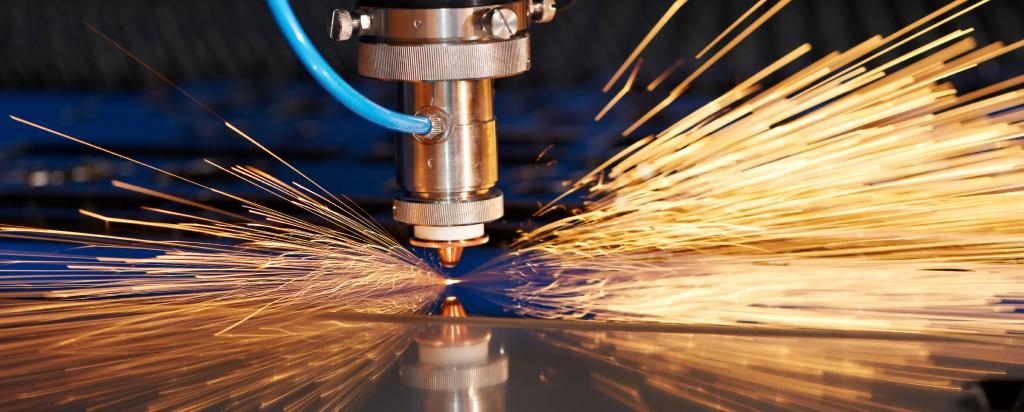
Laser cladding is used widely in the maintenance repair and overhaul of parts and structural components in the automotive and aerospace industries because it improves material properties.
“Directed energy deposition methods have a huge potential in repair and re-manufacturing of aerospace components, dies and moulds which undergo damage due to cyclic thermomechanical loading. However, the presence of tensile residual stresses in the deposited layer will reduce the fatigue life of restored component.
The fully coupled thermomechanical and metallurgical model developed in this collaborative work has been used to determine the critical deposition height which ensures compressive residual stresses in the deposited layer for sustainable restoration.” said Singh.
“Working with ANSTO team on experimental measurements of residual stresses was a great pleasure and learning experience and this paper is just the beginning of a long term collaboration,” said Singh.
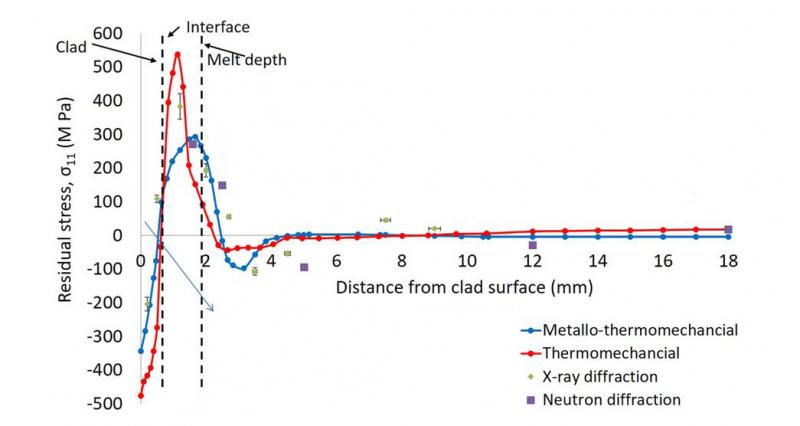
In the paper, the investigators reported that variation in residual stress across a cross section of laser clad steel, predicted by their metallo-thermomechanical model, demonstrated the existence of a critical deposition height.
The critical height of deposition corresponds to the layer thickness, which, when deposited, would maximise beneficial compressive residual stresses in the deposited layer and substrate.
Deposition that is lower than the critical height would produce detrimental tensile residual stresses at the interface while deposition that is higher than the critical height would result in excessive dilution.
The research also found that at the critical height of deposition, the solidification rate was at a minimum.
The Kowari residual stress diffractometer was used to measure macroscale residual stresses in a sample of H13 steel that was laser cladded with crucible particle metallurgy steel powders with a high vanadium content.
The three-dimensional measurements of residual stresses on Kowari are highly accurate and non-destructive.
“A model is only as good as its validation. Using strain scanning instrument - Kowari we were able to identify triaxial residual stresses in the deposited layers, which verified the locations predicted by the model ,” said Research Scientist and Industrial Liaison Manager Dr Anna Paradowska, who is a co-author of the paper with Dr Mark Reid.
Laser cladding, which involves depositing molten metal on a relatively cold substrate of steel, creates a complex residual stress profile.
Theoretical models based on thermomechanical properties, which are commonly used, were shown to overestimate tensile residual stresses and underestimates compressive residual stresses in the substrate and interface.
The team used surface X-ray diffraction at the Indian Institute of Technology for measurements of residual stresses in one direction. However it was important to have an independent fully non-destructive bulk measurements to also validate the in-house measurements procedure.
Both diffraction techniques showed the presence of tensile residual stresses near the melt front and compressive stresses in the deposited layer and interface regions.
“Understanding the stresses and being able to predict them is very important for additive manufacturing industry. Validated model is very beneficial as further optimalisation of the manufacturing process using this model will be cost effective and saves time,” said Paradowska.
“The model allows you to calculate the laser position rate to achieve a specific height of deposition while minimising the effect of detrimental stresses and maximise the beneficial compressive stresses.”
The study authors suggested demonstrated a science-enable technology solution that could lead to an improvement in the quality, safety and economics of components manufactured with laser additive processes.

